
How To Install Custom Blinds & Shades
Installing custom blinds and shades starts with careful preparation. This guide provides basic installation steps to help you check your package, confirm the mounting position, install brackets, and secure your window covering properly.
Whether for residential, hospitality, office, or commercial projects, proper installation helps ensure smooth operation, clean appearance, and long-term performance. For motorized products, please also follow the wiring, charging, remote-control, or smart-control instructions provided with your order.
BEFORE YOU START
STEP 1: PREPARE THE TOOLS
Make sure the required tools are ready before installation, such as a measuring tape, pencil, level, drill, screwdriver, screws, and brackets.

STEP 2: CHECK PACKAGE CONTENTS
Before installation, carefully check the package contents, including the shade, headrail, brackets, screws, accessories, and any control components. Make sure all parts match your order before starting.
STEP 3: CONFIRM THE MOUNTING POSITION
Confirm whether the product will be installed as an inside mount or outside mount. Check the window depth, wall surface, bracket position, and installation conditions before drilling. Inside Mount: Install the product inside the window recess. Please check the minimum depth requirement for the specific product before installation. Depth requirements may vary by product type, headrail, bracket, and control system. Outside Mount: Make sure the installation location is flat and can be drilled securely.

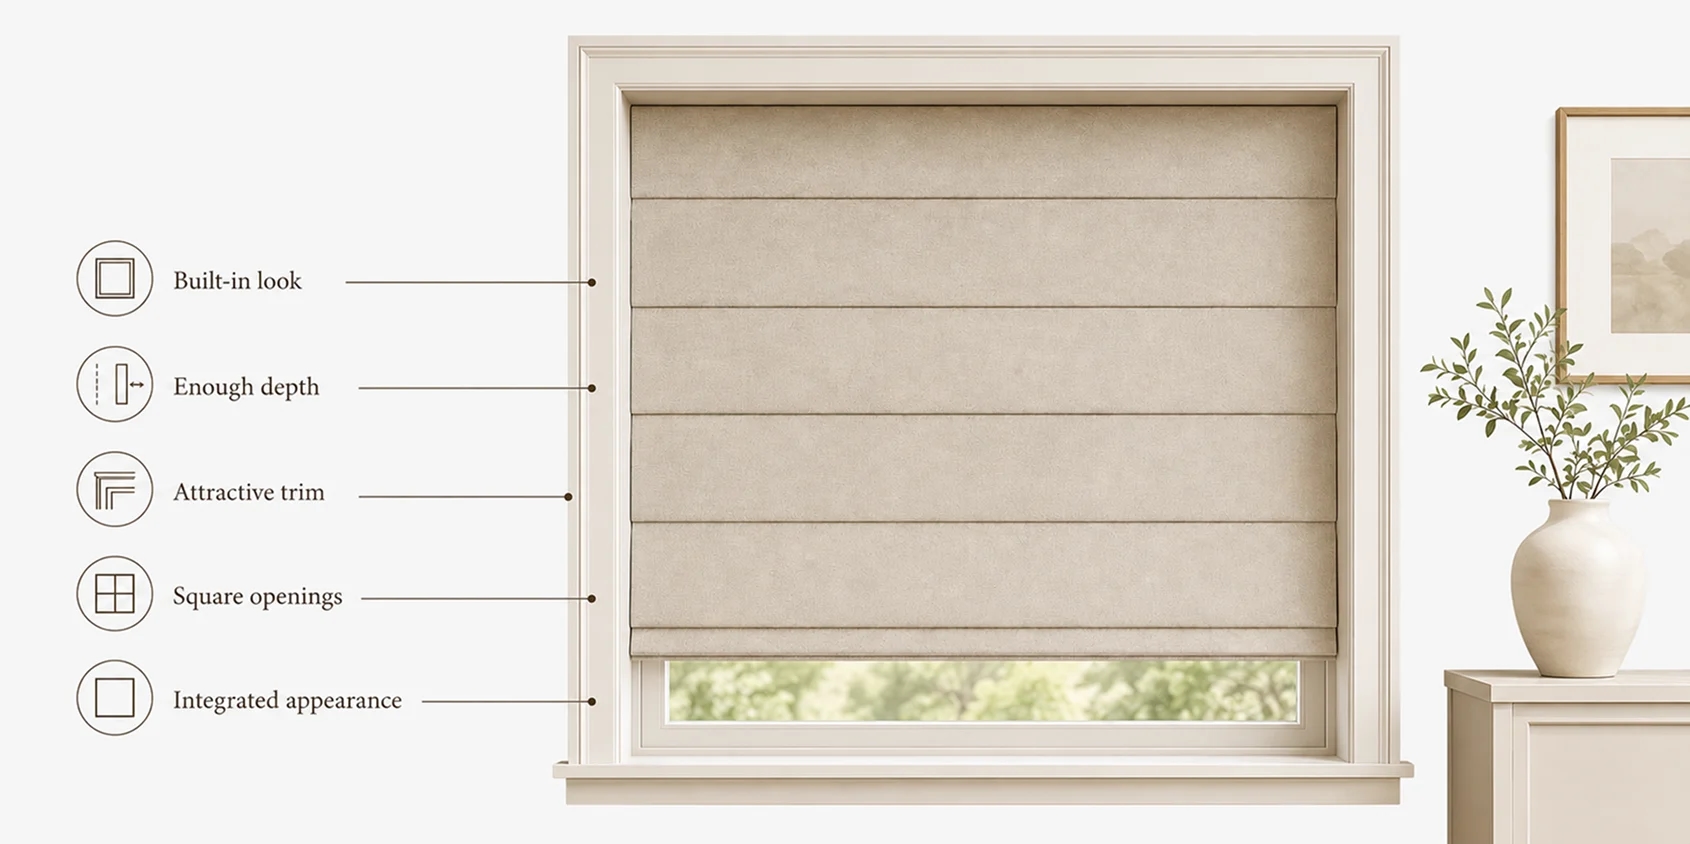
METHOD ONE: INSIDE MOUNT
Inside mount is suitable when there is enough window depth and the customer wants a clean, built-in appearance. It is commonly used for shades and blinds installed within the window frame.
TOP MOUNT
If you opt for an inside mount and your window frame width allows, top mounting is the optimal choice.
STEP 1: MARK POSITIONS
Determine the position for the brackets on the wall and the shade. The optimal position for the side caps on both sides to the center of the brackets is 4 inches. Mark the screw location on the wall with a pencil.

STEP 2: INSTALL THE BRACKETS
Drill pilot holes through the marked bracket positions using a power drill. Insert the expansion sleeve into the drilled hole. Place the brackets over the hole and insert the expansion bolt. Tighten the bolt with a screwdriver to secure the brackets.

STEP 3: INSTALL THE SHADE
Insert the front edge of the headrail into the front clip of the bracket, then rotate the headrail upward until the rear clip locks into place.

SIDE MOUNT
If you choose an inside mount but find that the window frame depth is insufficient for bracket installation, consider opting for a side mount.
STEP 1: MARK POSITIONS
Determine the position for the extension brackets on the side wall. Mark the screw holes on the side wall with a pencil.

STEP 2: INSTALL THE BRACKETS
Install the extended brackets on both sides of the wall. Fix the installation brackets and extension brackets with screws. Note: To prevent light leakage at the top after installation, ensure that the extended brackets are installed as close to the top of the window frame as possible. Also, ensure that the brackets on both the left and right sides are positioned horizontally.

STEP 3: INSTALL THE SHADE
Insert the front rebound part of the bracket into the shade valance. Hook the rear end of the bracket into place.

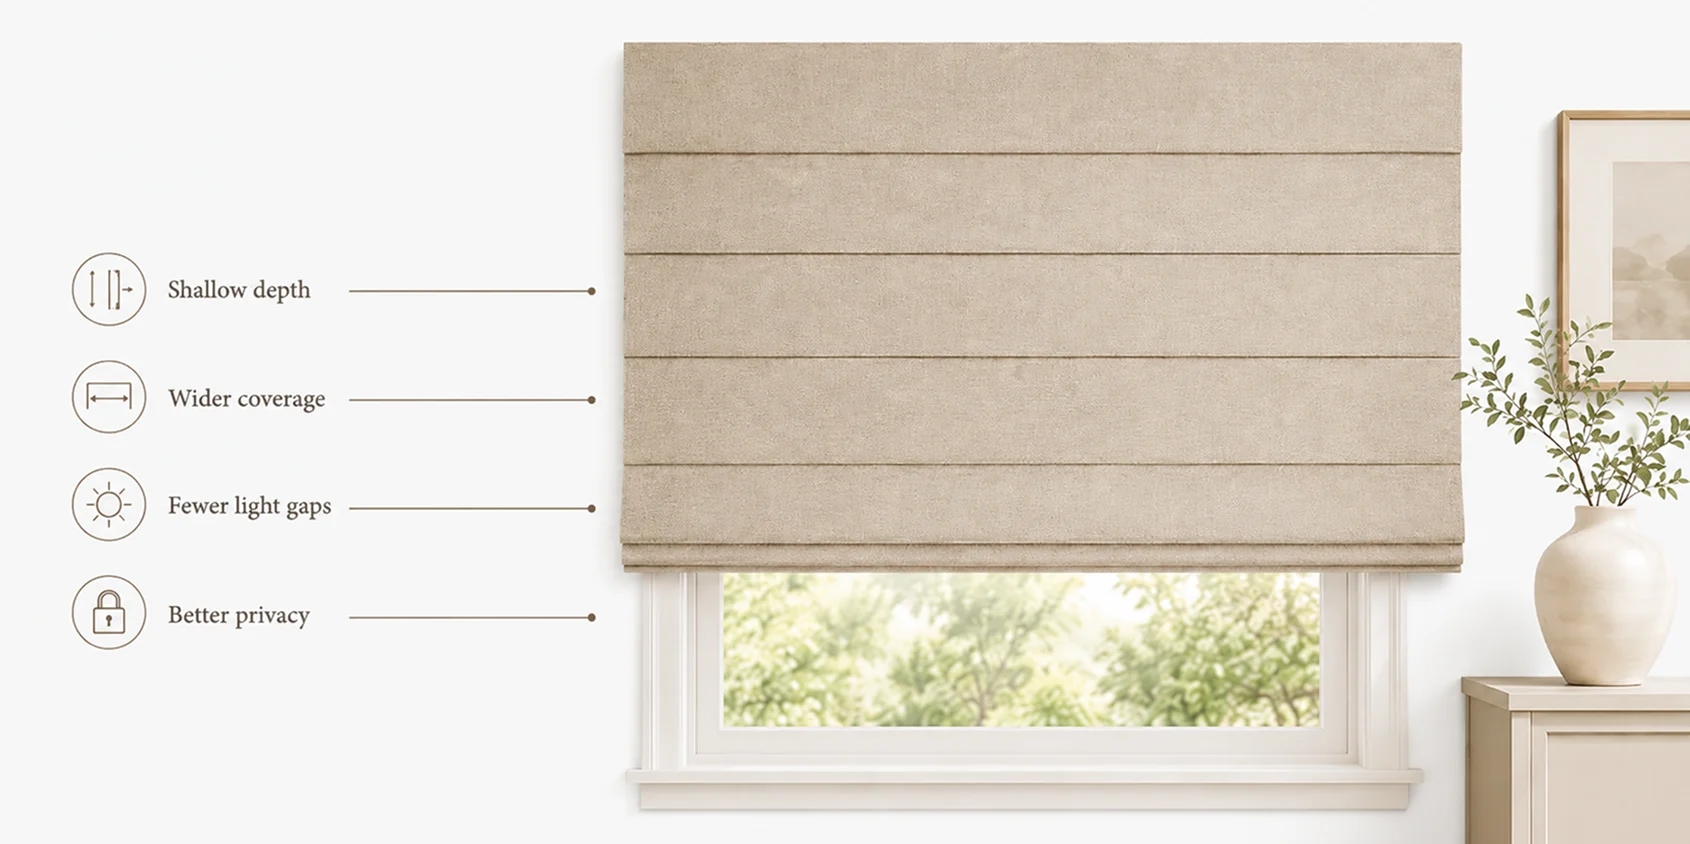
METHOD ONE: OUTSIDE MOUNT
Outside mount is suitable when the window depth is not enough, or when wider coverage is needed to reduce light gaps and improve privacy.
TOP MOUNT
If you opt for an outside mount and the space allows, top mounting is the optimal choice.
STEP 1: MARK POSITIONS
Determine the position for two brackets above the window frame and the shade. The optimal position for the side caps on both sides to the center of two brackets is 10cm or 4 inches. Align both brackets horizontally. Mark screw holes on the wall-facing side of the bracket with a pencil.

STEP 2: INSTALL THE BRACKETS
Drill pilot holes through the marked bracket positions using a power drill. Insert the expansion sleeve into the drilled hole. Place the brackets over the hole and insert the expansion bolt. Tighten the bolt with a screwdriver to secure the brackets.

STEP 3: INSTALL THE SHADE
Insert the front edge of the headrail into the front clip of the bracket, then rotate the headrail upward until the rear clip locks into place.

AFTER INSTALLATION CHECK
After the shade is installed, please check the following points before daily use:
- Make sure all brackets are securely fixed
- Check that the headrail is locked into the brackets
- Test the shade several times for smooth operation
- Confirm the shade is level and aligned
- Make sure there are no obstructions around the product
- For motorized products, test the remote, charging, limit settings, and control system
MOTORIZED PRODUCT NOTES
For motorized blinds, shades, or curtain tracks, please confirm the power type, motor position, charging access, remote pairing, and smart-control requirements before installation.
For hardwired systems, electrical work should be handled by qualified professionals according to local regulations and project requirements.